
There’s a misconception out there that you must have a smoker to slow cook meats.? Hang on kettle lovers, bear w/?me for a second.? What I’m trying to point out is that?there’s a lot of people that don’t understand that the?Weber?Kettle is?in my opinion, the most versitile rig for the money and you don’t need an offset firebox rig, a?”pellet popper”, a?Weber Smokey Mountain Cooker or any other “smoker” to slow cook meats.
Keep reading if you?want to see how it’s done.??For you?long time BBQ chefs………..there’s some pretty pictures to look at.
This is the most basic method.? Alternatives are listed at the bottom.
Here?s what you need:
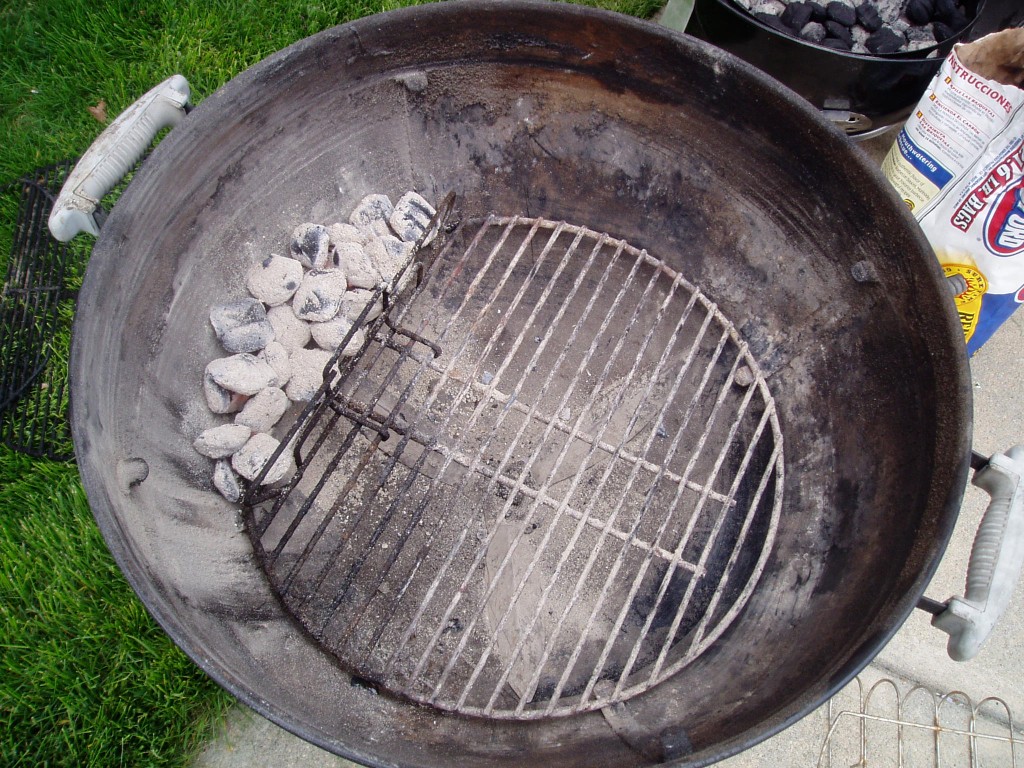
- ?Weber Kettle with hinged cooking grate
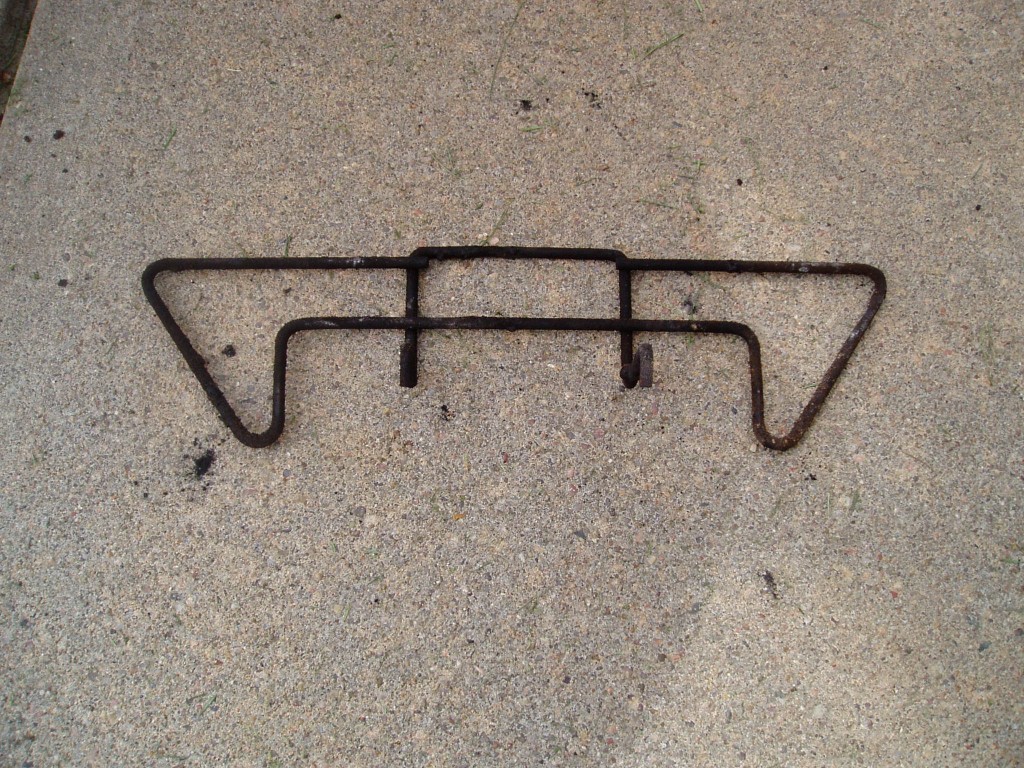
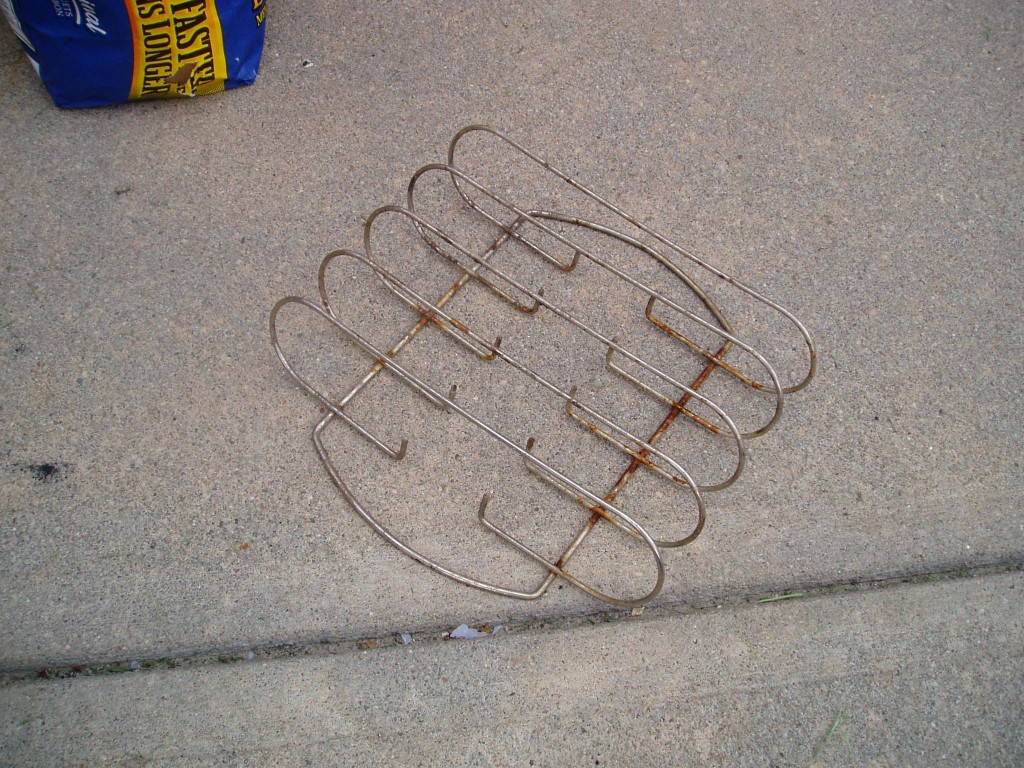
- Weber Charcoal rails
- Rib Rack
- Thermometer
- Kingsford Charcoal
- Smoke wood of choice ? Chunk or chips
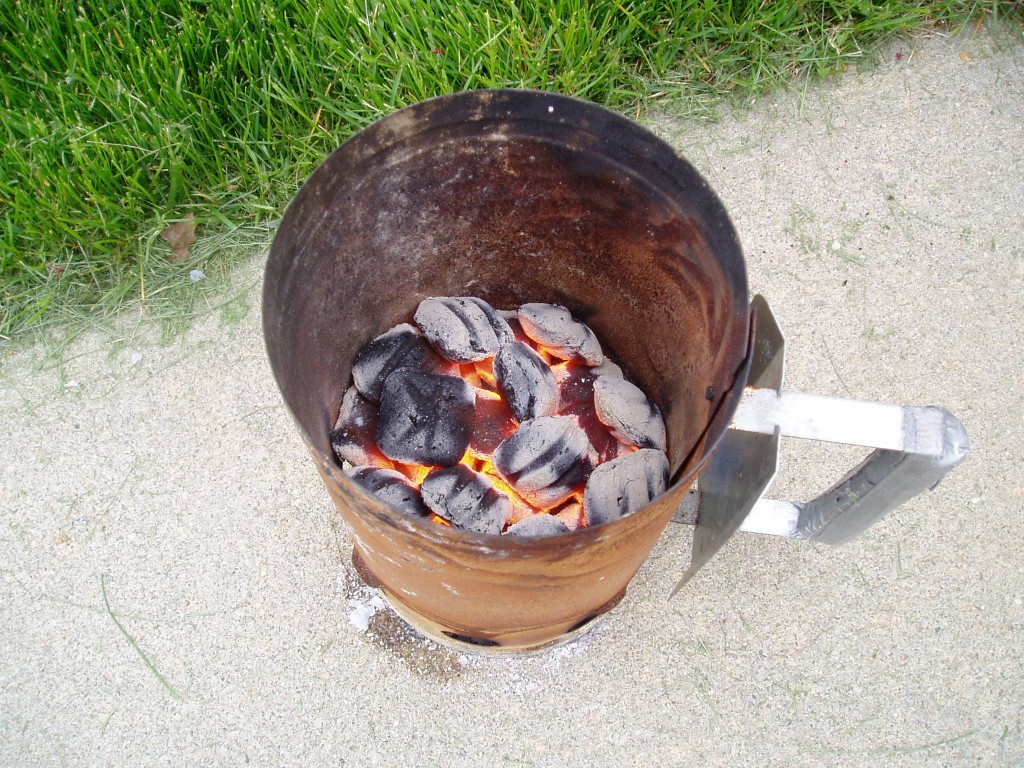
- Chimney Starter
- Meat of choice
- Beverage of choice
Notes:
- I suggest ribs for your first cook because they only take?6 hours.
- I’ll be illustrating the 3-2-1 method of rib cooking.? This means 3 hours of cooking in a rib rack – 2 hours of cooking wrapped and stacked in foil – 1 hour out of the foil and back in the rib rack.
- I recommend Kingsford charcoal.? You can change it up later if you?d like but the consistent burn of Kingsford will help you learn to slow cook on your kettle.
- You don’t have to have a hinged cooking grate but it makes it easier to add coal and wood.? BUT, you can sneak these items through the openings in the standard grate, just not big chunks of wood.
How to start the Rig:
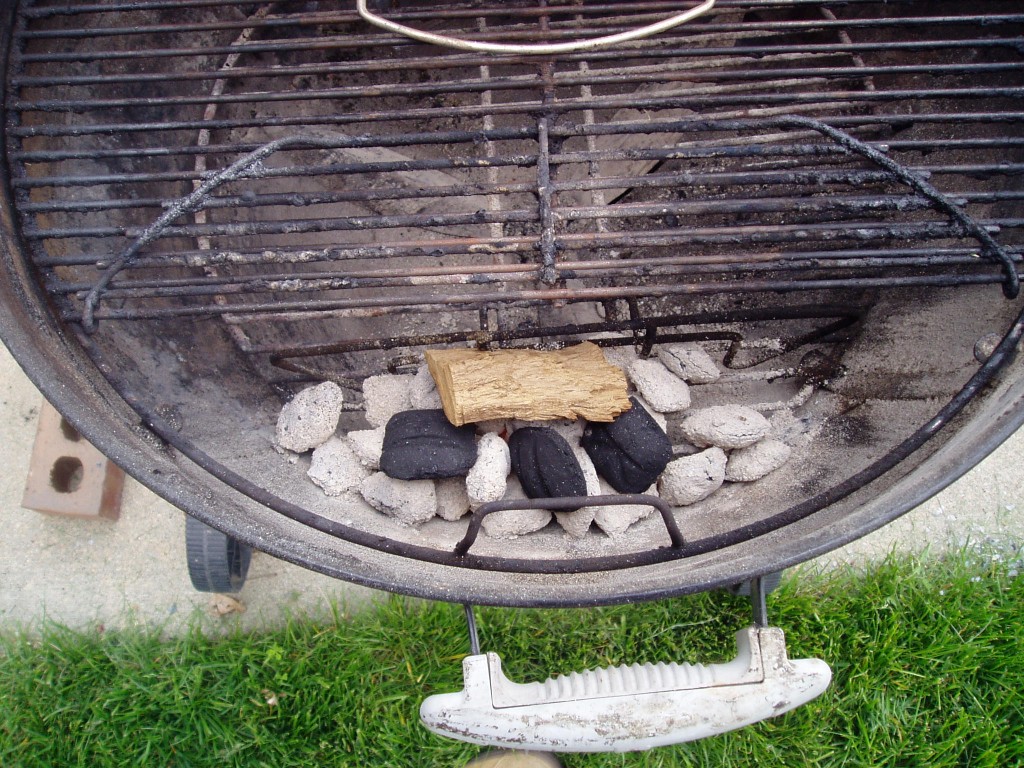
- Install one charcoal rail so the charcoal will be confined to a space a bit smaller than the hinged opening in the cooking grate.? There are two in the box so store the other one for later.
- Start 14 briquettes in the chimney starter ? not 18, not 10.??14!? I used 24 for this cook (knew it had a 4 in it)? I had to wait an hour for the temp to come down in the rig
- Wait until the coals are white with ash and dump into kettle behind charcoal rail
- Insert cooking grate and cover with lid.
- Open lid vent 100%
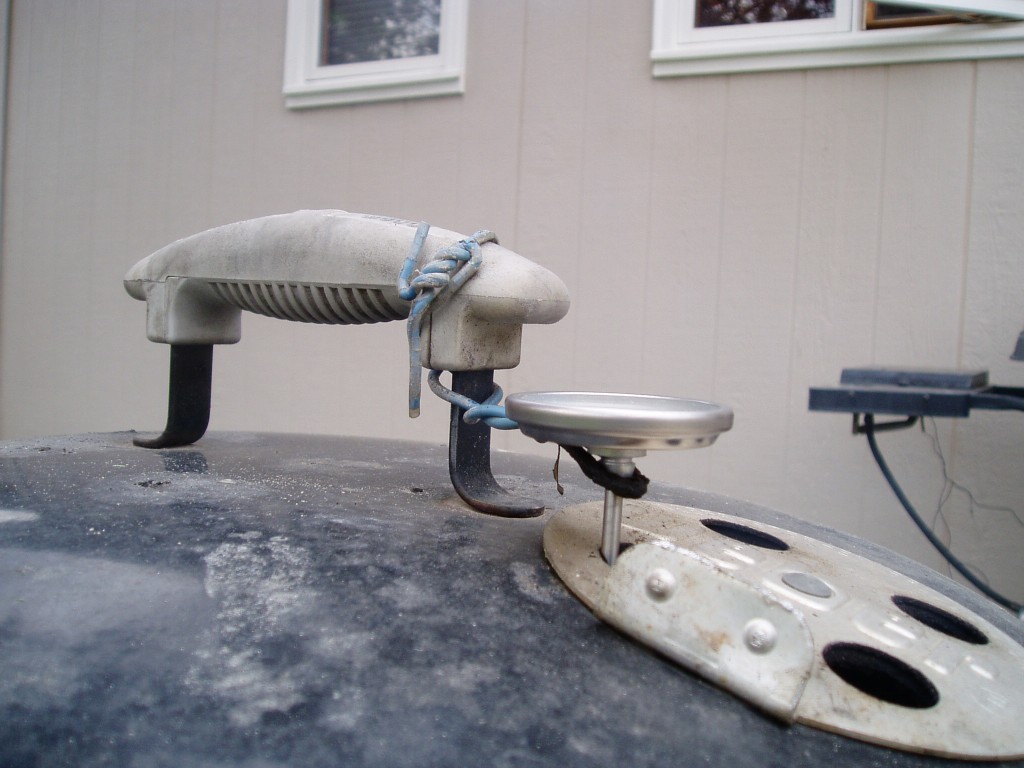
- Insert thermometer in one hole of the lid vent
- Adjust dampeners on bottom of kettle to 1/8? open for a one touch model and 1/4? open for the older model having the 3 separate vents.
Notes:? After you?ve set the vents leave the lid on and monitor the temperature.? You want to the temperature to be between 225-250 degrees.? It may take 10-15 minutes for the temperature to come up.? If it the temp comes up too high, limit the airflow coming through the bottom vents by closing them just a bit.? If the temp is not high enough, increase the airflow coming through the bottom vents by opening them up just a bit.? A slight increase or decrease in airflow will make a big difference so make small adjustments and be PATIENT.
Here’s how I rigged my thermometer into the kettle.? High tech!
How to cook:
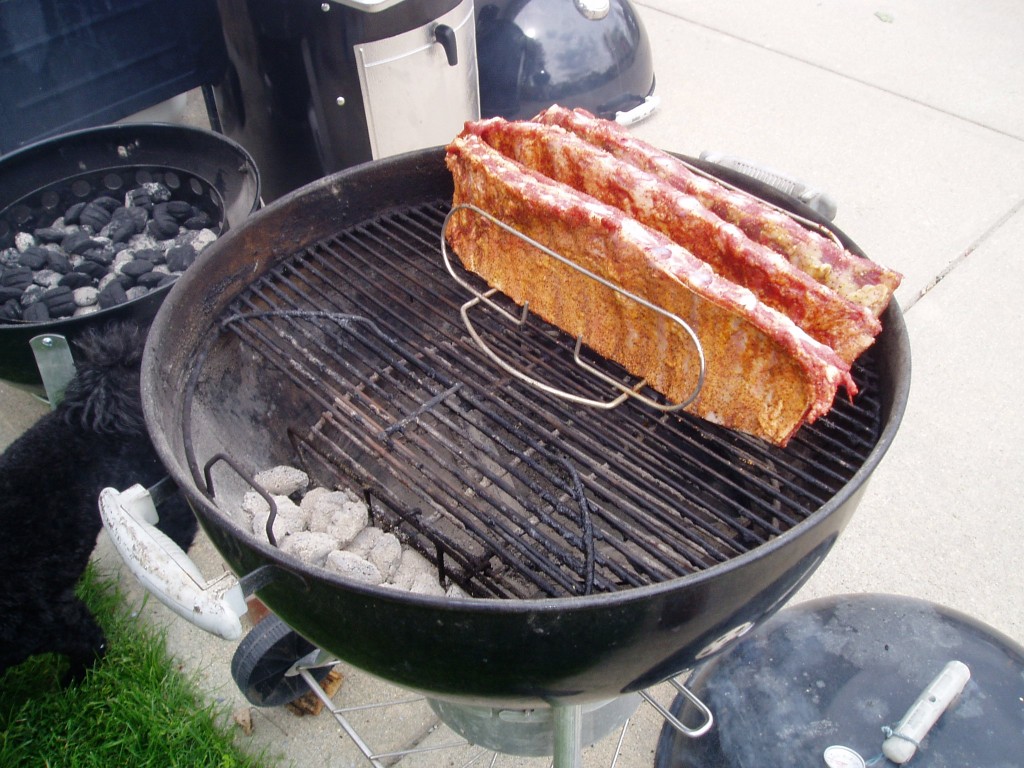
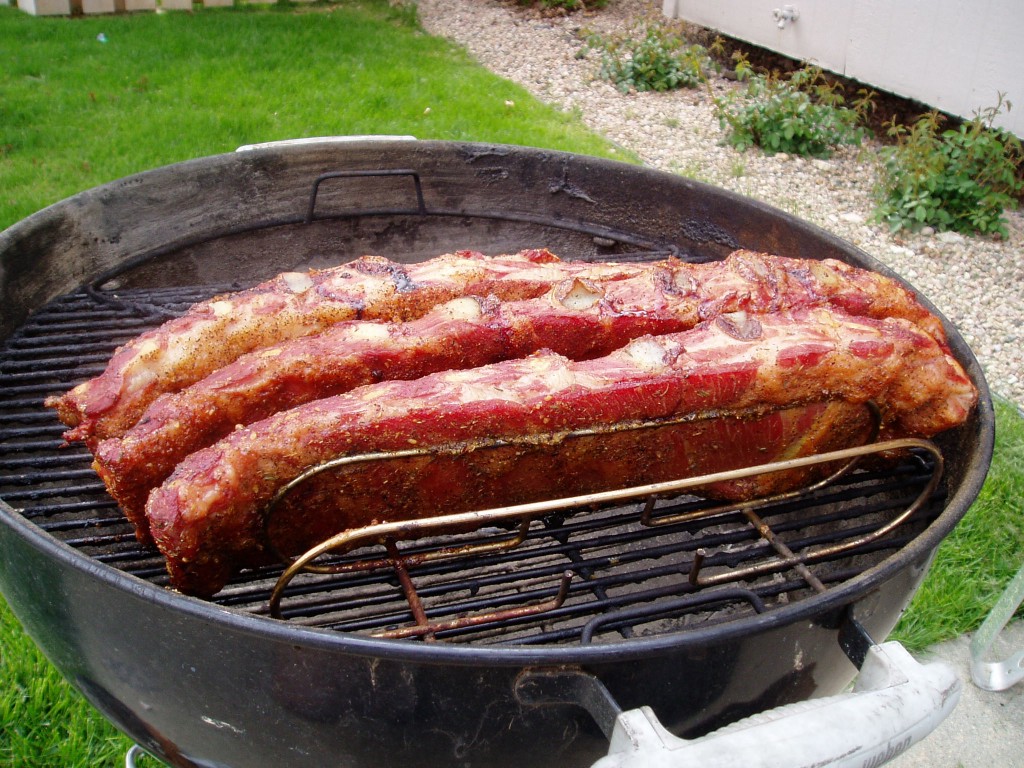
- Place meat(s) on? grate as far away from the coals as possible.? Using a rib rack is best for cooking ribs on a kettle.
- Add?3-4 unlit briquetts and?a small handful of wood chips or a chunk of smoke wood on top of the coals.? I used hickory for this run.
- Keep the lid on ?the kettle when cooking ? if your lookin? it?s not cookin?
- At this point the temperature will drop due to the cold meat on the smoker.? This is OK!? Don’t panic.? Just wait, it’ll come back.
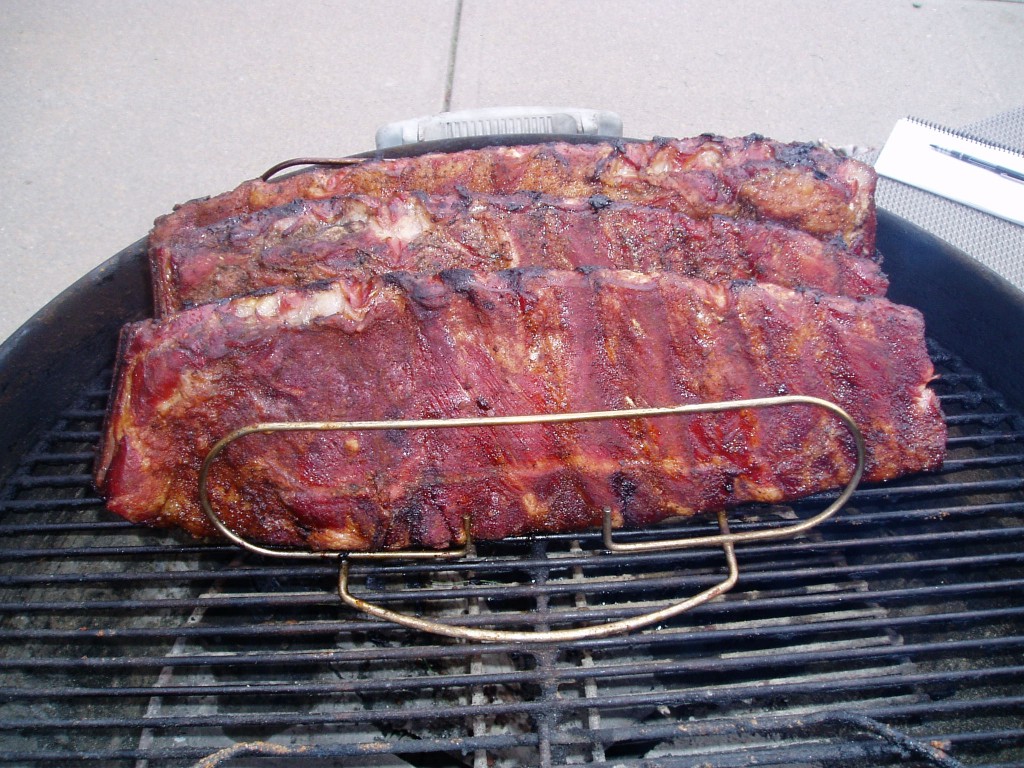
Notes:? As you can see below?I put the ribs in the rib rack meat side away from the heat.? Is this the right way?? This is how I’ve always done it and it seems to work out just fine.???Try to keep space between your racks of ribs?as much as possible to allow the heat and smoke to surround them while cooking.
How to cook:? Continued
- 30 minutes into the cook open the lid and look at the coals.? More than likely there will only be about half the amount of coal you started with.
- At this point I usually add 4-6 briquettes and stack them on top of each other.
- Add another chunk of wood as well.
- Check on the charcoal every 30-40 minutes until you are comfortable with how long the charcoal will last.? Add charcoal when it gets low.? I like to keep the coal in a pile and you can actually stack the coals so that only a couple are in direct contact with the hot coals.
Notes:? Add just enough wood to get a light smoke coming out of the top vent of the kettle.? An overpowering smoke flavor is not a good thing.? You are trying to acheive a balance of meat, seasonings, and smoke.
The length of time the charcoal will last is dependent on the weather.? When it’s cold out it won’t last as long.? You just need to pay attention until you’re comfortable with the process.
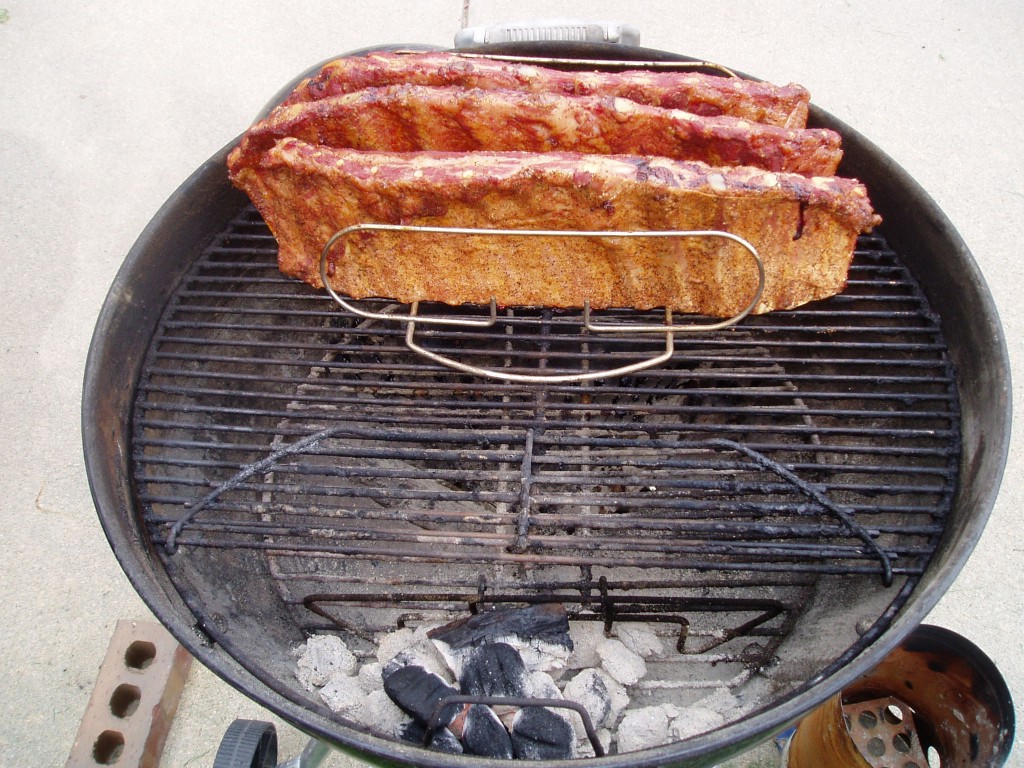
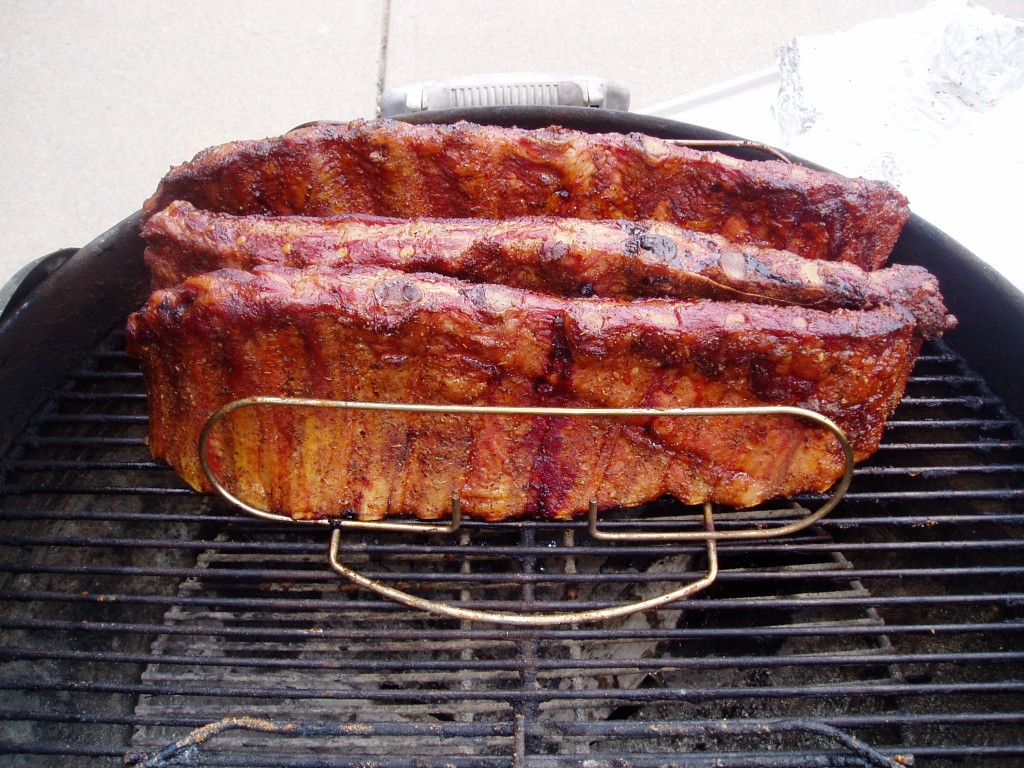
Here’s how they looked after an hour:
How to cook:? Continued
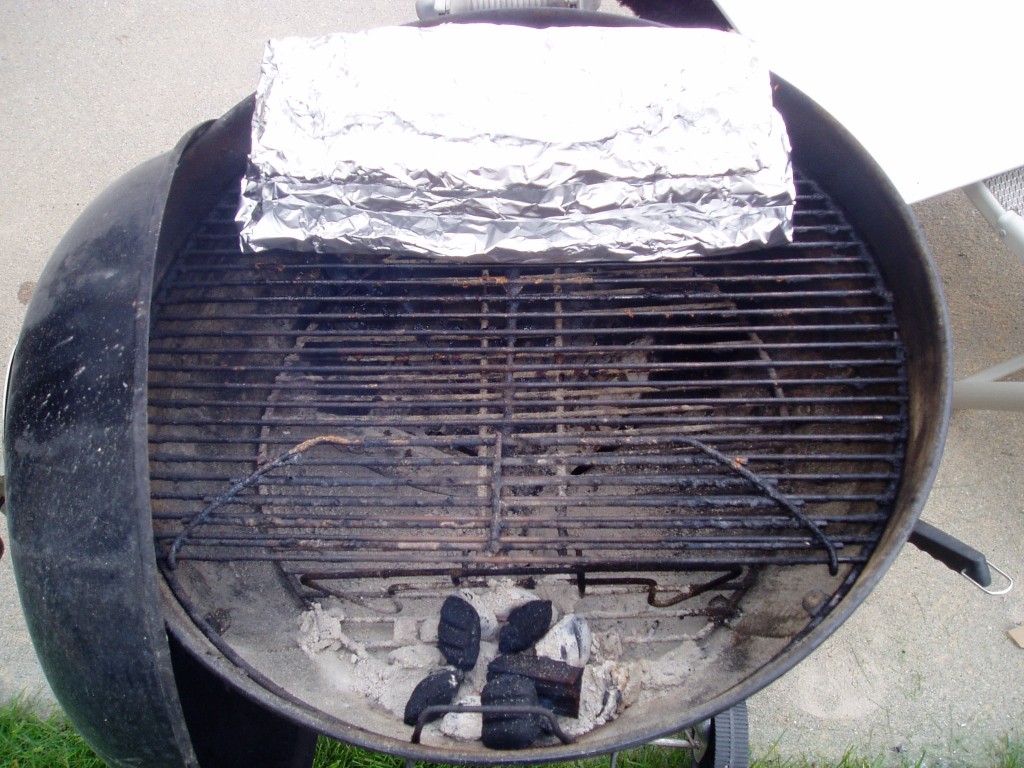
- Continue this process for 3 hours then wrap the ribs in foil.
- You can rotate the ribs in the rib rack during the 3 hours if you’d like.? I do to avoid overcooking the ribs closest to the heat source.? If you decide to, rotate them when you’re adding coal or wood.? Avoid opening kettle as much as possible.? When you open the lid on a kettle you’ve just lost all your heat.
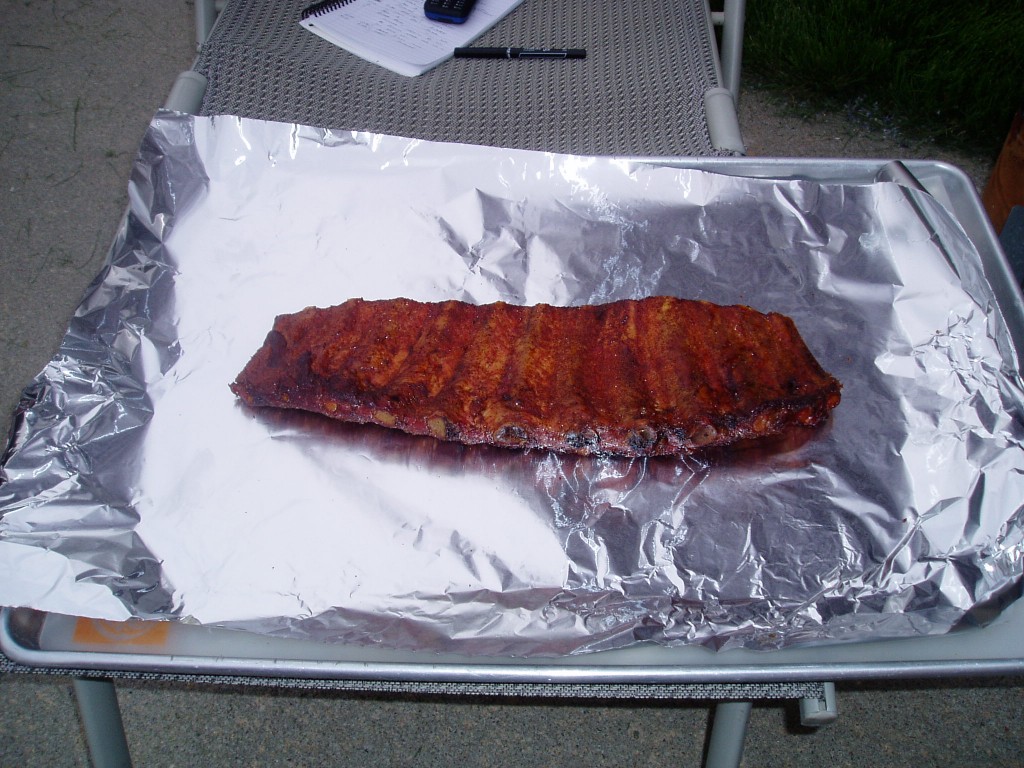
Notes:? I put them meat side down in the foil.? Why?? The moisture that condenses in the foil will come to rest in the bottom of the foil keeping the meet saturated w/ moisture.
How to cook:? Continued
- The foil will trap the moisture of the ribs and give them a good steaming.? This will make for a more tender?rib.
- After 2 hours pull the ribs out of the foil sauce both sides with your favorite sauce and put them back in the rib rack.
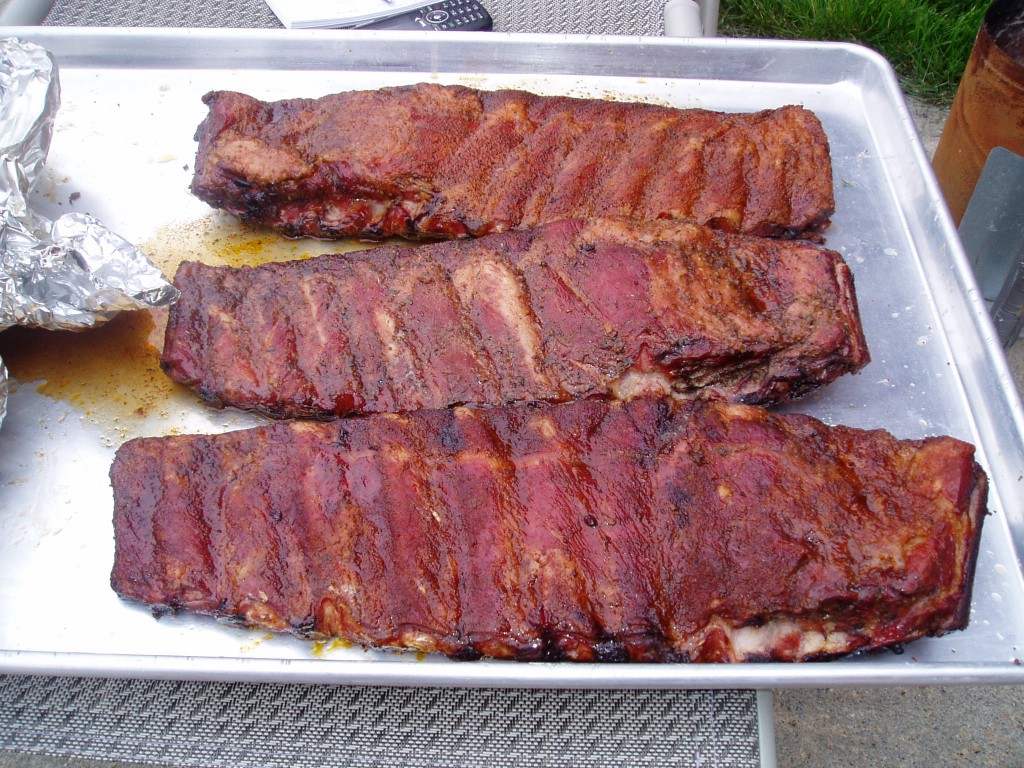
Notes:? I did not sauce my ribs this time because I was experimenting with 3 different rubs and wanted to taste the meat/rub combination without introducing a sauce.? In the picture above you can see the juice from the ribs on?the cookie sheet.
How to cook:? Continued
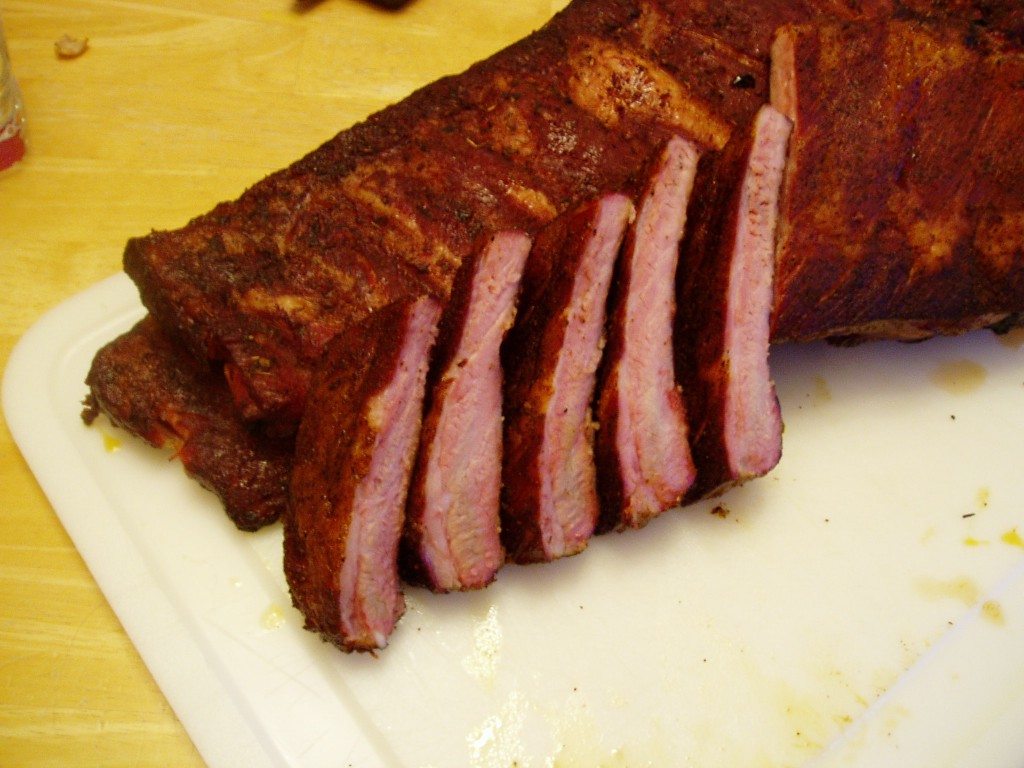
- Maintain the cooking temp for another hour.? Pull ribs and let cool for a bit before cutting.? 10-20 minutes of resting loosely covered in foil will let the ribs set up a bit and make them easier to cut.? Cut the ribs between the bones and serve.
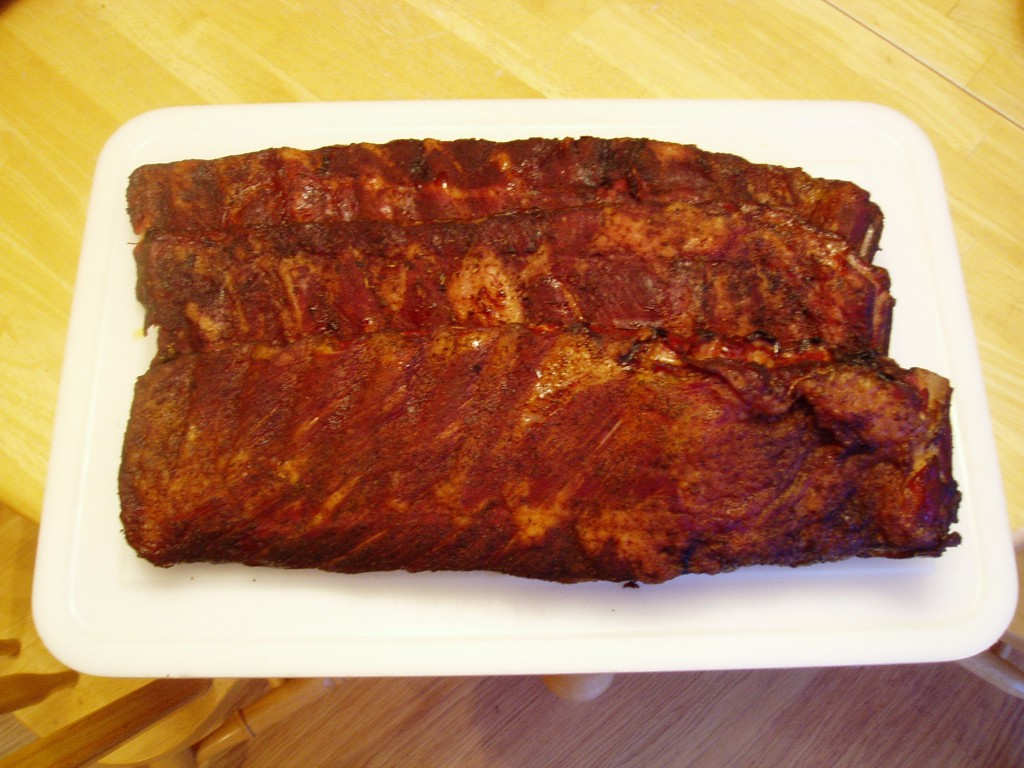
Here’s the finished product!
Comments:?
It will take approximately 6 hours at 225 to get the ribs done.? When done, the rack of ribs will bend really easily when held at the mid point of the rack.? If they just about break in half they’re the way most people like them.
Patience is key to good Q.? When you tell people what time your eating give a range not an exact time.? Sometimes things don’t get done on time and if you are bound by a schedule, you’re patience is gone.
These ribs turned out pretty darn good.? As far as texture goes, they could have used some more time in the foil perhaps.??All in all a good cook and a great time doing it.? It’s been a long time since I was brought back to my “roots” of BBQ.??My neighbors loved them as did my kids.
If you want to read about these “roots” of mine, take a look at the “All in the family” post.
Alternative?Cooking Methods:
This is the fun part.? You can do the following and I recommend all of them.
- Cook as stated but spray ribs with apple juice, add butter, re-season or whatever else you can think to add when wrapping in foil.? Now this is MY opinion….don’t put beer in here.? I enjoy a good beer and make my own but have ruined some good meat by adding beer to it.? Beer is for Brats or Sausage…..Framps has a post on some dang good beer sausage!
- Cook for 4 hours before wrapping.? Add your favorite sauce and cook wrapped for 1.5 to 2 hrs.? It’s easy to get them to fall of the bone this way.? You always here people say “they were so good they were falling off the bone”. Keep an eye on them.? When you see more than 1/4″ of rib sticking out past the meat along the edge of the rack you’re at the cusp of them literally falling off the bone.? The extra moisture from the sauce trapped in the foil will really work wonders.? Let them rest before cutting!
- Heck, don’t wrap them at all.? Spray with apple juice to keep the moisture on them.? Sauce during the last 45 minutes.
- Don’t sauce them at all.? A good dry rub is all you need sometimes.
- In a hurry?? Don’t try this one for your first rib cook.? Run the rig up to 275.? Put ribs in rack for an hour.? Add more wood than usual for a short blast of smoke.? Wrap ribs in foil w/?several squirts of apple juice for 3 hours.? Unwrap and cook for another half?hour w/ sauce.? These suckers wont have that dark color but they’ll be falling apart!
Folks – we also want to point you to another GREAT article on smoking spare ribs. Our buddy over at BBQ Dry Rubs, David, wrote this and it’s another great resource for you. Have a look! http://www.qualitygrillparts.com/smoked-ribs/
Pingback: Pork Rib Preparation « BBQ Revolution